January 31, 2011

Kristen and Dane's Engagement Party!

These two lovebirds have such great friends! Everyone played a part in putting together a great night of celebration for Kristen and Dane. There was good food, drinks, decorations, toasts, friends, and a ton of laughter! I got to be a part of some of the decorations. Thought I'd share some photos from the night! Congrats Kristen and Dane! We can wait to photograph your special day this September!

Some fun decorations mixed in with the already cute house!


We printed some photos from their engagement shoot and put them in frames and on clipboards.


 One of my favorite blogs inspired a lot of these decorations.

 My cutie husband surrounded by beautiful ladies...


 The guests of honor!


 Cheers!


The decorations that I did included:
-Cut out hearts on book paper strung on some baker's twine.
-Mason jars filled with sticks and wrapped in the same baker's twine.
-Photos on clipboards
-Photos in Picture frames

Thanks for following!

January 28, 2011

High Contrast B&W

I've noticed lately when editing photos, that I have been doing a lot of high contrast Black and White. It makes the images just pop off of the background and I love the sharp lines.

When having really high contrast, it gives the photograph an artsy look. Now, that is just my opinion. Some people do not like this type of edit. I've realized that so much of photography is one's opinion of what looks "good". A lot of that opinion has to do with the era that the individual grew up in. What was Photography like then? What poses were people looking for?

Anyways-- I'm taking two Photography classes at Chico State this semester for fun and to gain some knowledge and experience. I'll be sure to pass it along!


I thought I'd share some of my favorite high contrast B&W photos from the past 6 months. Enjoy!


 We are looking forward to capturing more moments like these! Have a great weekend!
Thanks for following...


January 27, 2011

My new best friend...

Yes, I have a new best friend. No, it is not a healthy relationship.


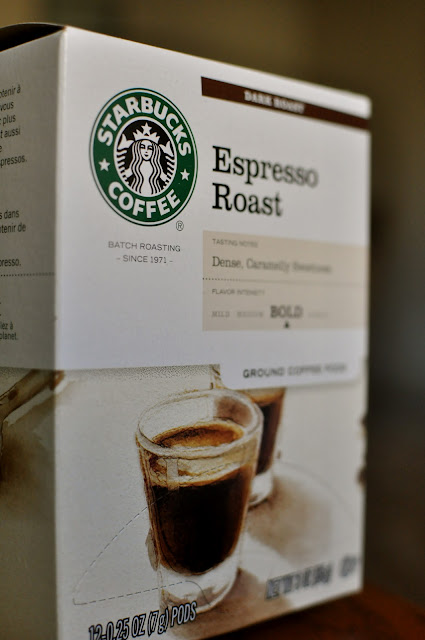
Okay, maybe this inherited espresso machine isn't really my new best friend. Travis' parents bought this espresso machine a few years ago and didn't ever use it unless it was Travis making the drinks. They were kind enough to let us have it so we dragged it back up to Chico with us this winter.

It does save us some money. Although, we did go to a coffee shop this morning in order to give me some motivation to get up early to read for a class.

We just buy these "pod shots" online and we're ready to go!


I need to work on my foaming skills. The foam is a little wet. But hey! I'm not an expert and no one else is complaining when they get a latte for free!

Heres my Vanilla Latte (added some flavoring) in my favorite mug. See this blog post  of when I got it!


Heres a sneak peek at what I'm working on for decorations of a friend's Engagement Party this weekend!


Thanks for following and if you are having a latte craving, head on over!:)

January 24, 2011

25 things you might not know about me...

I don't know if this is going to be of interest to anyone but I thought I'd share some things you might not know about me!

one. I am an avocado freak. I could eat it any time with any thing.
two. I am a perfectionist when it comes to painting my toe nails. And since I can't afford to get them done professionally, this works out pretty well!
three. I could listen to my Mariah Carey, BoysIIMen, Aaliyah, Toni Braxton, etc. Pandora Station all day.
four. I am afraid of the dark.
five. I consider Chico my home.
six. I hate shopping....doesn't mean I hate wearing new clothes;)
seven. I love watching documentaries.
eight. Travis and I watch 48 hours mystery whenever we can find a new one online. Guilty pleasure.
nine. I already know what my first baby's nursery will look like...kinda creepy. Don't judge.:)
ten. I have an outtie belly button. I used to ask my mom if I could have surgery on it. I like it now.
eleven. I am a twin.
twelve. I want to be a garage sale woman...if only they were at night and not at 7am on a Saturday morning.
thirteen. I am a San Diegan who has never stood up on a surf board.
fourteen. I have the funniest husband. Seriously. Get to know him.
fifteen. My ideal day would be lying by the pool on a 90+ degree day. Then again, whose isn't?!
sixteen. I dream about traveling to Portugal, Spain, and Ireland.
seventeen. I could also eat Mexican food too often.
eighteen. My husband has helped calm down my Nordstrom Rack addictions....a little bit.
nineteen. I couldn't be happier that this is my last semester of college. It's been amazing but I'm ready.
twenty. Chocolate. Thats it.
twenty one. I have always wanted an older brother. Maybe that's because I have four sisters!
twenty two. I prefer camping over a hotel room.
twenty three. I have my dad's toes. And chicken legs.
twenty four. I was a tomboy growing up. The only girl in my family to play sports in high school.
twenty five. Photography is a passion of mine that I pray will bring joy to others.

What are some things I don't know about you?

January 18, 2011

I think I like headbands...

My mom came to Chico and spent the past two days with us. It was so great spending some time with her and we even got to craft! She kept laughing at me for taking pictures of the crafts. I just told her "I gotta keep the blog alive!"Anyways...

Here is another post on headbands/hair accessories. Super easy and cute!
Supplies:
-Hot Glue gun
-Scissors
-Fabric
-Hair clips
-Buttons, beads, pearls, etc. (to decorate the accessory)


Step 1. Cut 6 circles 2 inches in diameter. Two will be used for the bases.
Step 2. Cut 4 circles about 1 and 1/4 inch in diameter. I used the bottom of a coffee cup.


Step 3. Fold 4 of the larger  circles into fours. To do this, first fold it in half. Put a small dot of hot glue towards the center of the straight edge, then fold it in half again. 


 I leave mine like this, not making it completely overlap. It add some dimension.

 Step 4. Hot glue all 4 of the circles to the base (one of the 2 inch circles). This circle can be the same fabric or different, it doesn't matter. I hot glue it by just putting a small dab (smaller than a pea) toward the middle of the base circle. You don't want to hot glue it all the way down or it might look too flat.


 Step 5. Repeat steps 3 and 4 with the smaller circles.


 Step 6. Attach either a button, pearl, etc to the middle. I just hot glued this button on.

 Step 7. If you want to make it into a headband, use the last circle you have left and hot glue the headband in between the circle and the "fabric flower".

My mom made the two small ones for my little sister. She hot glued the hair clips to the flowers. Make sure you hot glue the curved side to the flower so the flat side is on your head.


 These are are really easy and you can use any fabric! They would be great gifts, stocking stuffers, or just for yourself!:)

Thanks for following and let me know if you make some! I want to see your masterpiece:)

January 16, 2011

Just another day in Paradise...

After being in Indiana for over a week in freezing weather, getting back to San Diego was quite glorious. Just walking out of the airport I realized that I didn't have goosebumps while being outside. Travis and I had to run some errands close to the coast and we decided to stop by the beach! It couldn't have been a more beautiful day. We didn't have our bathing suits or anything but we spent about 20 minutes just laying in the sun on the hot sand. Here are a few photos of our time!


 We stopped by a coffee shop and enjoyed the biggest White Mocha we've ever had. It was pretty tasty!


We are now back in Chico, California. It's not quite as warm here:( but I can almost feel the sun hitting my back just looking at these pictures!

Enjoy your day and if you live in Southern Cali...enjoy the hot sun!

January 12, 2011

Nylon Baby Headbands

I knew I wanted to have some crafts for our Indiana trip. These headbands are quick, easy, inexpensive, and very cute!

 Supplies:
-An "egg" from Walmart that has the two nylon leggings in them. They are 33cents per egg. Pictured below.
-Hot glue gun
-Fabric of your choice
-Needle and thread


The tutorial to make the nylon headband is found here.

Step 1. Follow the video above to make the nylon headband.


Step 2. Cut a strip of fabric about 2 inches wide and however long it is given.
Step 3. Fold the strip of fabric in half like a hot dog and iron it.


Step 4. Begin to roll and twist the fabric into a flower. I hot glue gun the twist every half circle or so.
If this isn't making sense, google 'How to make fabric flowers' or something like that:)


Step 5. Grab a scrap piece of fabric and hot glue gun it to the bottom of the flower for more security.


Step 6. Hot glue gun the flower to the headband by putting the hot glue on the headband and then securing the flower to the nylon.


Step 7. Find a cute baby to wear it!

Once to get it down, you can make plenty in no time. Feel free to ask questions!


Thanks for following!