October 27, 2010

Beautiful friends

A few weeks ago a friend asked me what my dream for my future is. I did not know how to respond. I have many passions but I could not think of any that could be potential careers. I went home and started praying and thinking about what I could possibly want to do once I graduate(which is so soon!). Well, for those of you who do not know, I love Photography. It is a passion of mine and feel called to capture the special moments in people's lives.

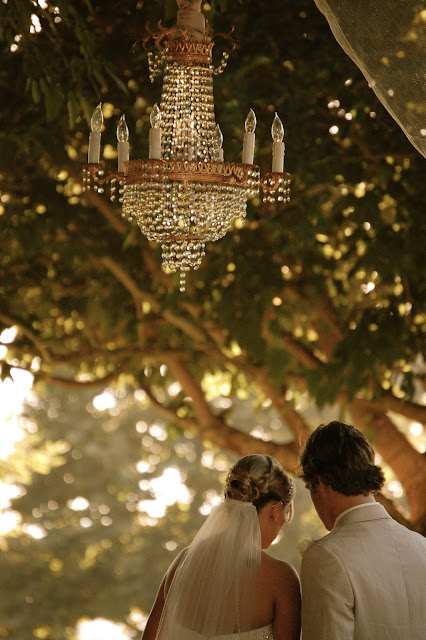
For the past few weeks, my husband and I have been working hard to build our own Photography business. It is still in the works. However, a big step in this process is building a portfolio. I had asked a bunch of my girl friends to help me out with this. The girls all took great photos and here are just a few of the keepers from our session yesterday:


Thank you, friends. You are all beautiful.

We will let you know how the business plan is going as we progress.

Thanks for following!

October 20, 2010

DIY braided headbands

Okay, you have got to make these headbands. They are super easy and cute!

Materials:
-2 safety pins for each braid
-6 strips of fabric at about 20 inches long and about 1 inch wide.
-5 inch piece of elastic (Got a pack at Michael's for less than $2.)
-a sewing machine would be easiest but since I don't have one, I used a needle and thread to sew the braids to the elastic.

Six pieces of fabric:

 Step 1. Gather three pieces of fabric and use a safety pin to hold them in place.

 Step 2. Braid the fabric all the way to the bottom and then use the other safety pin to hold it together.
Step 3. Repeat the above steps for the other three strips of fabric.
This is what your braids should look like:

 Step 4. Cut elastic for your headband.
*Note: Everyone's heads are different. So, I measured how much elastic to use for my headband by putting the braids on my head and then measuring how much elastic it would take to fill in the gap (Husband helped there).
 Step 5. Either use your sewing machine and do a straight stitch, or, use some thread and a needle and sew the elastic on top of the two braids.

 Step 6. Using your sewing option, sew the other end of the braids to the elastic. (In the picture below, you can see where I threaded the elastic to the braids.)

Here are some finished headbands!
The smaller one is for my little sister ( to be honest... it was the first one I made and I didn't cut enough fabric. Either that or I just have an abnormally huge head).


Here is what it looks like on! 

I hope this inspires you to make yourself you a cute headband. I am thinking they will be great stocking-stuffers!

You can mix and match any fabrics and it will look cute! The fabrics in the one I am wearing did not go well together at all but I think it turned out pretty well!

Thanks for following!

October 15, 2010

DIY dining room chairs

Once again, this is old news to those of you who are friends with me on Facebook.

This is a fairly simple, but time-consuming project. I did not realize how long this would take. My husband was out of town for a few nights and I wanted to surprise him with some cute newly covered dining room chairs!

Materials:
-New fabric measured depending on the size of your seats.
-Staples and staple gun
-Screwdriver or something to pry out old staples!
-Whatever materials it takes to remove old fabric from chairs(like screwdriver).

Here's what the dining room chairs looked like before:


This table belonged to my stepdad's grandmother. I think this was the original fabric.

Step#1. Pick out your replacement fabric!
Step #2. Remove the current fabric. This takes a lot of muscle. There had to have been at least 60 small staples in every chair. Friends helped me.
Step #3. Measure out the replacement fabric.
Here is how I measured how much fabric to cut:


Step #4. Attach new fabric to chairs and secure.

Old vs. new
 I picked two fabrics. I liked both of them and I was really happy with the results. I did four chairs in the floral print and the two end chairs in the other print. I wanted something different. It worked!


 Finished product!


I just love how the two fabrics turned out!


If you are thinking about recovering some chairs, do it. It is so worth the work. According to my grandmother, "it gives the table new life!"

Thanks for following!

October 12, 2010

DIY Dollar Store Trays

Who doesn't love a Dollar store DIY Project?

I have seen this idea on a few blogs like these:

http://tatteredandinked.blogspot.com/2010/04/birthday-update-party-trays.html

http://www.joyshope.com/2010/06/carnival-of-tiered-trays.html

Materials:
-Dollar Store Tin Trays
-Spray paint of your choice
-Some sort of base, I used candlesticks from World Market.
-A tough adhesive to glue the tray to the base
-Scrapbook paper of your choice
-ModPodge and brush


Step #1. Spray paint your trays and candle sticks. I did the bottom of the trays first and when they were dry, did the top.

 The top doesn't have to be perfect because scrapbook paper will be covering any blemishes.


Step #2. Cut out the scrapbook paper to fit in the tray. This was kind of tricky. I traced the circular tray and then cut in .5 inches and worked with it. For the rectangular tray, I just laid the paper in it and marked where it needed to be cut.

Step #3. Modpodge the heck outta it. I cover the backside with ModPodge then put another layer on the top after I have smoothed it to the tray. (be careful of bubbles!)


Step #4. Glue the candle stick to the bottom of the tray. Use books or some other heavy object to hold the candlestick down to the tray.


 Step #5. Make some delicious Funfetti cupcakes and serve them to the Birthday girl with her awesome trays as a gift!


Oh, and get a picture of the birthday girl with her trays because she's pretty cute too!


Just a reminder that these are not food or dishwasher safe. That's why I used cupcake liners. You could put down some more paper or something if you wanted to put food directly on the trays.

You could also use these trays as:
-Jewelry organizers
-Potpourri displays
-A place to put your junk on your dresser!
-Desk organizers

Hope you liked them, Emily! Happy 21st Birthday!!

October 10, 2010

Kyle and Meghan Lovelace

This is a little overdue. This gorgeous wedding took place in Valley Center, CA on September 11th, 2010. If you are friends with me on Facebook, this is old news to you. But those of you who aren't, I thought I'd share some photos from this beautiful couple's special day. I'm sure their photographer couldn't get enough of their beautiful location!


Before the wedding started we caught the Bride heading to the Ladies Room with her Bridesmaids...


First of all, Meghan's decorating skills are amazing. The wedding was one of the most beautifully designed events I have ever been to. It was very chic...very her.


She arrived in style in a vintage car and was absolutely stunning. Here they are taking communion and filling their unity vases.


The Kiss

After the ceremony, the guests got a spend some time in a very cute appetizer area until the Bridal Party was finished with photos.

The couple's first dance


The delicious cake


We enjoyed being a part of this wedding so very much. They are dear friends and we are excited for their life together now as husband and wife. Thanks Lovelaces for letting us see you become husband and wife!

October 9, 2010

October 8, 2010

DIY Fabric Flowers

Recently, I came across this fad of flowers made out of fabric. A friend of mine looked up a tutorial and said it was super easy. I have seen them on a few blogs and they're to die for. Here is what some of them look like...

Check out The Anderson Crew to see how she made this awesome necklace:


http://andersonfamilycrew.blogspot.com/2010/10/diy-fabric-flower-necklace.html

My friend Krissy is getting married next June and she ordered this garter off of Etsy:


(something old, something new, something borrowed, something blue)

Check out this Etsy site to see more of her work: http://www.etsy.com/shop/rosebudlips


I decided I wanted to try this fad out! I have this horrendously boring LapTop case that I have been wanting to replace. Since I can't really justify spending $30 on another LapTop case, I decided to do some DIY craftzies.

Materials:
-fabric of your choice
-felt
-doily
-hot glue gun
-scissors


Step #1. Cut out pieces of fabric about 2 inches wide and 15 inches long. The bigger you want the flower, the longer you should make the fabric.

Step #2. Start to roll and twist!

Step #3. Use your hot glue gun to glue as you twist. Glue just enough to keep it in place. At the end you will use some felt to secure it in the back.
                                                                     First one done!

Step #4. Attach doily to LapTop case


Step #5. Cut out a circle of felt

 Step #6. Finish the rest of the flowers that you want and hot glue gun or sew the back of them to whatever your base is.


The main problem with this is that now my husband won't really like using this case. But hey! That just secures the Mac as mine even more so!

You can use any fabric and I'm sure it will look cute.

Enjoy!